A pin squat is a squat performed from safety pins in a rack, usually starting from the bottom position. That makes it less forgiving than a standard squat, but it also makes it useful for building strength, improving positioning, and learning to create force without relying on a bounce. Done properly, the pin squat is a training tool, not a test of how much discomfort you can tolerate.
If you have been stuck halfway out of the hole, losing your brace, or cutting depth because the bar feels unstable, this variation gives you a clear place to work. You can control the starting height, use a manageable load, and practice one strong rep at a time. The boring truth applies here: good setup, enough food, consistent training, and patience beat a dramatic challenge workout every time.
What the pin squat trains
The main demand is force production from a dead stop. In a regular back squat, the descent creates tension and the stretch-shortening cycle gives you some assistance as you reverse direction. With a pin squat, the bar settles on the pins. That pause removes much of the rebound, so your quadriceps, glutes, and trunk have to restart the movement.
The exercise also exposes weak positions. If your hips shoot up, your knees collapse inward, or your chest folds as you stand, the pin squat will make that obvious. That feedback is useful, but it is not a reason to load the bar like a competitive powerlifter on meet day. Most people should begin with about 50% to 70% of their regular squat one-rep max, depending on the pin height and how long the bar rests.
A high pin position, just above parallel, lets you handle more weight and focus on the upper portion of the squat. A lower position near your normal depth demands more mobility, control, and starting strength. Neither is automatically better. Choose the position that matches the problem you are trying to solve.

How to set up safely
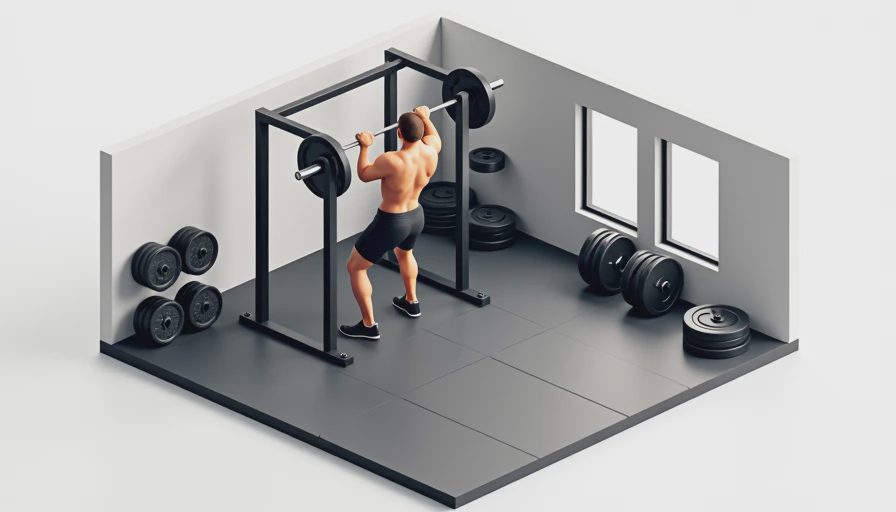
Use a power rack with sturdy safety pins and set the bar so it rests at your intended squat depth. When you unrack the bar, walk back only as far as needed. Your feet should be roughly shoulder-width apart, with toes turned out slightly. Take a breath into your abdomen and sides, brace as if preparing for a firm shove, and lower under control until the bar contacts the pins.
Do not drop the bar onto the pins. A hard crash can shift your position, damage equipment, and turn a controlled strength exercise into a shoulder or back problem. Let the bar settle for one full count. Keep your feet planted, maintain your brace, and drive through the floor. The pin squat should begin with a quiet reset, not a bounce or a rocking motion.
Use an empty bar for your first few practice sets. Check that the bar clears the rack, the pins are level, and you can escape safely if a rep fails. If you train alone, set the pins high enough to catch the bar while still allowing you to squat to your chosen depth. Safety equipment is not an admission that you expect to fail; it is how adults train with heavy objects.
Sets, reps, and loading
For strength, try 3 to 5 sets of 3 to 5 reps with two or three minutes of rest. Keep two good reps in reserve during your first sessions. If the bar grinds, your back position changes, or you lose the ability to pause cleanly, the set is over. More weight is not more productive when technique has left the building.
For practice and muscle building, use 3 or 4 sets of 6 to 8 reps at a lighter load. This range gives you enough repetitions to learn the movement without turning every set into a nervous-system event. The pin squat is usually best placed after your main squat or as a secondary lift once or twice per week.
A simple four-week progression works well. In week one, perform 4 sets of 5 with a conservative weight. In week two, add 5 pounds if every rep was controlled. In week three, keep the weight and aim for a cleaner pause. In week four, reduce the load by 10% to 15% and recover. You do not need to add weight every session to make progress.
Common mistakes that waste the exercise
The first mistake is setting the pins too high. If you only bend your knees a few inches, you are training a partial squat, not solving a problem at your usual depth. The second is using the same weight as your normal squat. Starting from a dead stop is harder, and the correct load will often look surprisingly modest.
Another mistake is relaxing completely on the pins. Your muscles can remain loaded while the bar is supported. Keep your torso organized, hands tight on the bar, and feet pressed into the floor. A brief pause is the goal; turning the rep into a long rest changes the exercise and makes the next repetition less consistent.
Finally, do not chase fatigue for its own sake. If your lower back is already tired from deadlifts, your sleep has been poor, or your knees are irritated, choose a lighter variation or skip the movement. Training hard means applying enough stress to adapt, not collecting injuries as proof of commitment.
Pin squat compared with other squat variations
A paused squat keeps the bar on your back and asks you to pause at the bottom without resting it on equipment. It usually demands more continuous tension and balance. A box squat uses a box as a depth target, but sitting too heavily can change the mechanics and encourage rocking. A pin squat offers the clearest dead-stop start, making it useful when starting strength is the specific weakness.
Front squats shift more work toward the quadriceps and upper back, while goblet squats are excellent for beginners learning to control depth. None of these movements needs to replace your standard squat forever. Think of them as tools in a toolbox. Use the one that addresses your current limitation, then return to the main lift and see whether your technique has improved.
For a busy parent or a lifter training three days per week, the practical plan is simple: keep one regular squat day, add the pin squat as a secondary movement for three or four weeks, and record load, reps, pin height, and how the final set felt. That log tells you more than a random social media challenge.
Who should use it, and what to do this week
This exercise suits intermediate lifters who can already squat with consistent depth and understand basic bracing. Beginners can learn it, but they should first get coaching on rack setup and standard squat mechanics. Anyone with persistent knee, hip, or back pain should get individualized advice from a qualified clinician rather than forcing a new variation.
Your assignment this week is straightforward. After warming up, set the pins at your normal squat depth, perform 3 sets of 5 with a weight you could lift for at least eight clean repetitions, and rest two minutes between sets. Film one set from the side if you can. Look for a stable torso, quiet contact with the pins, and a strong drive upward.
The pin squat will not transform your body in 30 days, and it does not need to. It can make one weak point stronger while teaching you to respect position and repetition quality. Eat enough. Train hard. Repeat. That is the plan that survives a Tuesday.

No comments yet — be the first to share a thought.